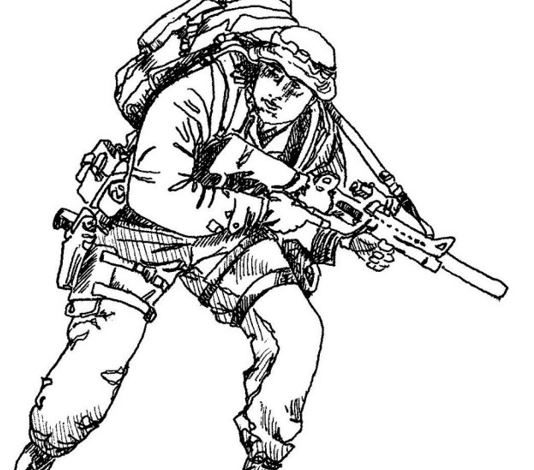
How To Draw A Soldier
How To Draw A Soldier There are many different armies in the world, and these armies are full of men and women who fight and give their lives for their country. Different armies use different uniforms, technologies and weapons in their efforts. We have all seen soldiers around us in society, in movies and on television, or even in our families.
Many people like to show their support for soldiers in the army by learning how to draw a soldier. This guide you are about to follow will show you just how easy it can be! We hope you enjoy this step-by-step guide to drawing a soldier! If you are looking for drawing ideas, cool drawings, drawing for kids, cartoon drawings, flowers drawing, animals drawing then you are at the right place, here you will get all of these drawings.
Step 1:
For this step of our guide on how to draw a soldier, we will start with the head and shoulders of the soldier. For the head, you will wear a helmet with a night vision helmet on top of the helmet. Then you can use lines under the face for the soldier’s scarf. Finally, you can draw the soldier’s shoulders and arms with a few curved lines. Once satisfied with how it examines, you’re qualified for stage 2!
Step 2:
We will add the chest and some of the equipment in this step of drawing your soldier. You can use lines that come down between the shoulders. In this step, you can add equipment such as bags and other items to your uniform. A rectangle shape in the center of his chest will serve as his armor, and you can also add the other minor details you see in the reference image.
Step 3:
Now that you’ve completed the soldier’s head and chest, you can add the arm on the left that holds his assault rifle. You can use lines of bulges from the shoulders to make his arm and hand. Then you can add padding in the elbow area, as shown in the reference image. Finally, the rifle will be drawn with some straight lines coming down from your hand, and more minor details will also appear. Before continuing, you can also pull his belt with his uniform lapel underneath.
Step 4:
We will count the warrior’s face and rather portion for this portion of your warrior picture. The face will be drawn with simple lines for the eyes and nose. You can modify these elements a bit if you like to make a unique facial term for him. Ultimately, you can pull his portion on the left.Then leg will be drawn with more jagged lines representing your uniform fabric. You can also finish this leg by adding a knee pad and a boot.
Step 5:
Before moving on to the last step of this guide on how to draw a soldier, we will first draw the final details and elements. First, you can draw the right leg, which will look like the one you drew in the previous step. Finally, you can complete this step by adding your gloved hand to the right arm.
This will work for all steps in this guide, but before you continue, you can add any additional details or things you want! You can draw a background to show what terrain this soldier is navigating, or you can draw something like a tank behind him. Another idea you could use would be to draw a camouflage shape or add some extra details to his uniform.
Step 6:
Now that you’ve reached the final stage of your soldier drawing, you can bring it to life using your unique colors! In our reference image, we used green, gray, and black to color the soldier. This is just one example you can use, and you have many options to color this soldier drawing.
Depending on the terrain, a soldier’s uniform can come in several color combinations. You can use whites and light blues for a snowy setting, greens, browns for a jungle setting, or browns for a more arid desert setting. Once you know how you want to color this soldier drawing, you have to decide what you will use to color it! You can use watercolors or colored pencils to give the soldier a softer, more subdued look.
On the other hand, acrylic paints and colored pens would be great for more vibrant colors. What do you think you’ll use to complete it?
Accomplish this to bring your fighter picture to the following story.
Get this soldier ready for action as we show you how to make this excellent soldier design. Soldiers can be found in many different environments and locations around the world. I could show where this one is by adding a background to this soldier sketch!
Maybe it could be in a hot desert, a frozen and snowy area, or maybe a jungle. These are just a few settings you can use to give this artwork a sense of place. Where do you think this soldier might be? This next suggestion for drawing your soldier will go very well with the previous one! If you change the background of this soldier, you can also change the details of his uniform.
For example, if you place him in a snowy environment, you can use light grays, blues, and whites for his uniform. You will probably want to use shades of greens and browns in a jungle setting. Do you think you will give this soldier different camouflage details than he has now?
Soldiers rarely operate alone so you can add fellow soldiers for this one. Now that you’ve mastered this drawing of a soldier, you should have no problem doing it! Follow the steps in the guide, and then tweak a few more details to have them in different poses. You might have a whole squad of soldiers on the page! When operating, soldiers use all sorts of different weapons and tools to get the job done.
You would have plenty of opportunities to add fantastic extra elements to this soldier sketch! These can be anything from fancy guns and rocket launchers to even bigger things. Some models would be cars or actually a tank. Some of them might take a bit of research to get the finer details right, but that’s part of the fun! What tools would you add to this excellent soldier character?
Your soldier drawing is complete!
We hope this step-by-step guide on how to draw a soldier has made drawing this topic much easier and more fun than you expected! We created this guide to break it down into more manageable and straightforward steps, and with the help of the guide, we wanted to ensure that finishing this soldier wasn’t a battle!
Now that you’ve completed the guide, you can continue adding your essential details and additions! We mentioned a few ideas you could do, like adding a background or additional elements.
You can also use your favorite colors and artistic mediums to add your touch to this design. Once you are ready to have more fun drawing, you can visit us on our website for many more fantastic drawing guides! You’ll want to visit us often, as we frequently upload new guides. We’d love to see your awesome soldier drawing when it’s finished! You can share your artwork on our Facebook and Pinterest pages so we can take a look. We can’t stay to visit your unique products!