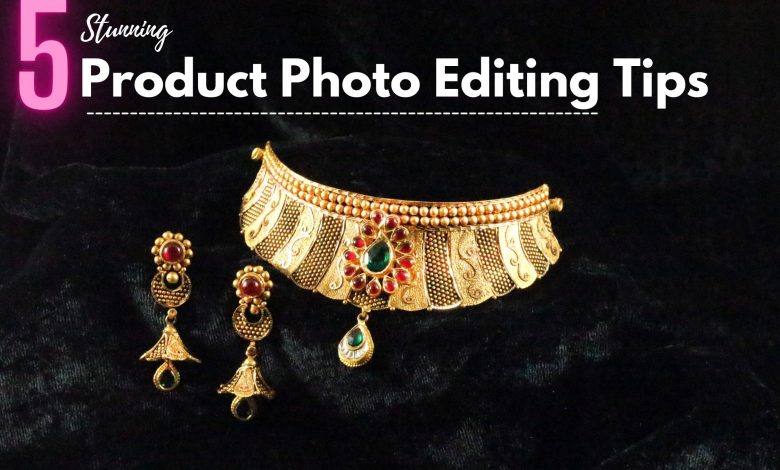
Product photo editing will come to your mind first if you’re selling products online. To be honest, selling product online is not a piece of cake. You want to know the reason why? And how can you get rid of the photo editing problems? Then, read this article from the beginning to the end to know the important product photo editing tips & tricks.
Requirements For These Product Photo Editing Tips?
- A computer with a minimum (2GB RAM, 2 GHz Processor, HDD 3.1 GB of storage space);
- Internet Connection for researching purpose;
- Adobe Photoshop CC Skill Level: Intermediate.
What kinds of Adobe Photoshop skills you need?
- Clipping Path
- Image Masking
- Background Removing
- Color-Correction
- Retouching
- Exact Cropping or Resizing & Shadow Effects
Ok, let’s start with the first product photo editing tips.
#1 Proper Setup

Proper setup is usually mandatory action for everything. And if you want to set up properly, you’ll need to set up your mind first. And when it comes to editing a product photo then you must make up your mind to go through. Firstly, you’ll need a professional graphic design tool. I’ll recommend you to use the latest version of Adobe Photoshop CC & Lightroom. Because these tools are used by so many professional graphic designers. Secondly, create a project environment in your computer hard drive. It’ll help you a lot to work smoothly for further instant and future modification.
Photo Size Accuracy
You know what? Every eCommerce marketplace requires you to use a certain ratio for an image. If the image doesn’t fit with the template layout then how the elegance of a product showcase would be engaging. So, check out the photo size requirement and set up your workspace.
What to choose RGB or CMYK?
First thing first. RGB stands for (RED, GREEN & BLUE) and CMYK stands for (Cyan, Magenta, Yellow, Key/Black). Basically, RGB is used when you just want to work on a project that will be shown on a digital screen. And you’ll use CMYK when you want that to get available outside the digital screen and it’s called a physically printed project.
Here’re few examples of RGB & CMYK …
RGB: (Digital)
- Web design
- Product photo editing/design
- Logo
- Online cover and profile photo
- Visual content
- Infographics
- Online ads etc.
CMYK: (Physical)
- Business Cards
- Stationery
- Stickers
- Billboards
- Posters
- T-shirt design etc.
So it’s your choice, why you want to edit your product photos. Is it for digital viewers or it is for physical papers? If it is for digital then go for RGB otherwise go for CMYK.
Read more about Fashion Photography Tips
#2 Apply Advanced Photoshop Techniques

Adobe Photoshop is an amazing tool that gives full customization power over it to a user. Your creativity will create an attribute of yourself. So, creativity plays an important role. In advanced techniques, we have clipping paths, image masking, and background removal. To optimize an image professionally, you must know these methods properly and professionally. Most of the service providers who edit product photos professionally, they always follow these types of methods to bring a high-quality final output in order to grab customer’s attention.
Where to do clipping path and image masking? We use clipping path when a photo has hard edges, round or rectangular shapes with a minimum number of holes, fewer lines, etc. On the other hand, we use image masking when a photo has soft edges, hairy objects, fur, complex lines or curves, etc.
But which method will be effective to get a natural look? I’ll recommend you to go for image masking. It gives a natural look to a product image. Most of the time, both methods will be used in a single project for the desired output.
Now, move forward to the next one Background Removing.

You’ll find a thousand of a website who provides background removal service online. Many of them are worthy and some of them are not. But it’s not that hard task to do so. If you know the methods I mentioned earlier then it’ll be almost easy for you to go through. As always remember, professionally learning makes things professional. So, be professional.
Don’t have high-end equipment to shoot a photo? Or even if you have, there are no odds on the photo that can do miracles. What to do in both cases then?
Well. Figure out the right background color or image for your photo that suits it accurately. After that, remove the background and replace it with your desired background. Most of the eCommerce marketplaces require the use of a white background. So try this out now to change your background color.
#3 Color Correction
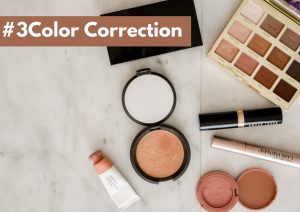
Color correction plays a vital role in the photography industry. Raw images contain a mix of various colors that give photos an imprecise look. At the same time, it focuses on the overall photo. The photo contains a few main objects that should look more natural and apparent. There’s a word known as colorization. And it’s kind of a comprehensive thing. A normal photo is quite easy to fix the white balancing but what to do with a black and white photo?
The Black and White photo is kind of complex compared to the normal one. Because you don’t know what color was on the original photo. That’s why you need to figure out the color on your own and apply that as per your anticipation. But, if your picture has a mix of colors, use Adobe Lightroom CC. The process is known as HSL color correction. It’ll give you much more flexibility over a particular color in case you need to reduce or increase the rate of a certain color.
#4 Retouching

Retouching refers to editing a photo gently. A captured image contains dust, unwanted elements, blemishes, scratches, and glitches sometimes. This is where retouching helps to remove those elements from the image and enhance the quality of the photo. Nowadays, if you’re selling your product online and you want to generate enormous customers then you must retouch your photos. Yeah, you can upload an unprocessed photo and do hard work for raising the amount of sale. But does it really fulfill your expectancy? The answer is NO. Ok then look at this photo below.
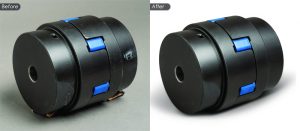
The original photo looks dusty and there’s no glow. But the second one looks much more clear and attractive. Grabbing customer’s attention is quite hard if your product photo looks fuzzy and messy like the first one. Even if you put down the price, the picture’s view won’t attract customers that much. Consequently, they won’t take a further step to buy the product. This is why you must learn product photo retouching techniques to get your potential customers in your bucket. Just be a professional at this task and then it’ll be easy for you to edit your product photos. Finally, let’s move forward to the next product photo editing tips.
#5 Shadow Effects
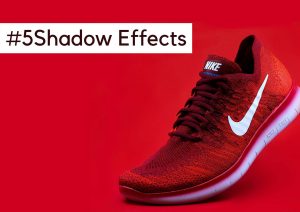
When you’re using lighting while capturing your photo, it reflects nearby objects. This is what makes the photo looks realistic. But when you’re working on that file, you may delete the shadow part erroneously. But, here’s the thing, that’s the beauty of that photo. It’s better to retouch the shadow in a professional way. This will look much more realistic and authentic.
There’re various types of shadow effects out there. For example, Drop Shadow, Reflection Shadow, Natural Shadow, etc. To figure out when to use which one then you must understand the environment of the product photo. As per product placement & environment, you’ll decide which one fits the photo effectively. And finally, start following these tips from now and observe the changes.
Thanks. That’s all for today. Hopefully, we’ll come up with another interesting topic very soon. Till then, just chill and stay safe.